Getting Started
Manage Targets
Manage Scans
Manage Organizations
Organization Settings
Plans
On Prem
Scan Recorded Pages & Actions
How to Perform a Scan Recorded Pages & Actions Scan
Before You Start
Ensure the latest version of the ZeroThreat Chrome Recorder Extension is installed on your browser.
1. Select Your Target
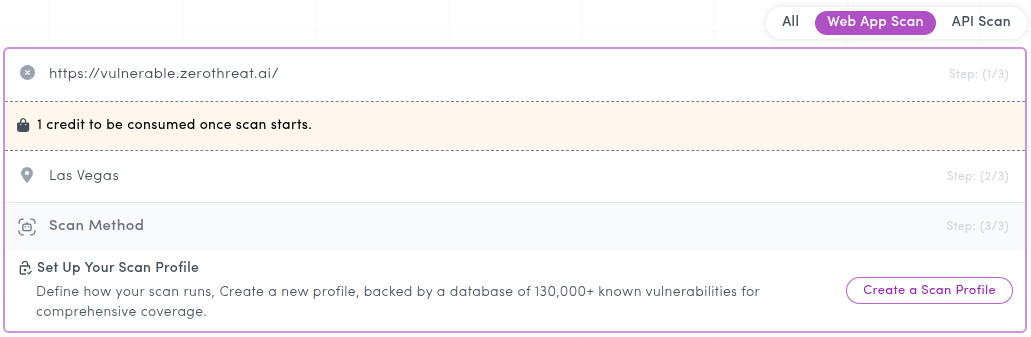
From the ZeroThreat dashboard, click Scan the Target and choose the web application you wish to scan. Next change the scanning server if required.

2. Under the Authenticated Scan Section
- Under Scan Method, you will now find the option to Set Up Your Scan Profile. Click on Create a Scan Profile.
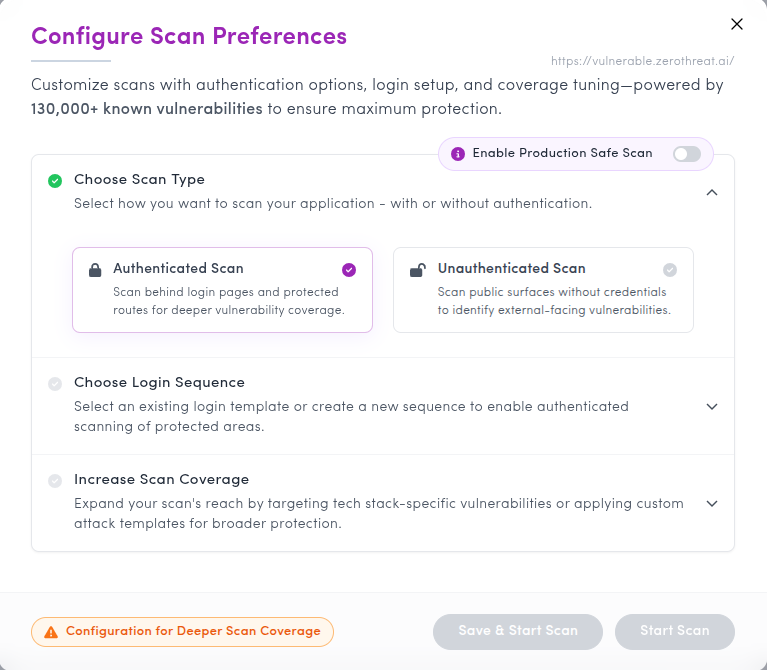
- This opens a new popup called Configure Scan Preferences. Under Choose Scan Type, select Authenticated Scan.
- Next, under Choose Login Sequence, click Create New Login Sequence to create a new one. If you already have a previously created login sequence, you can select and reuse it for future scans.
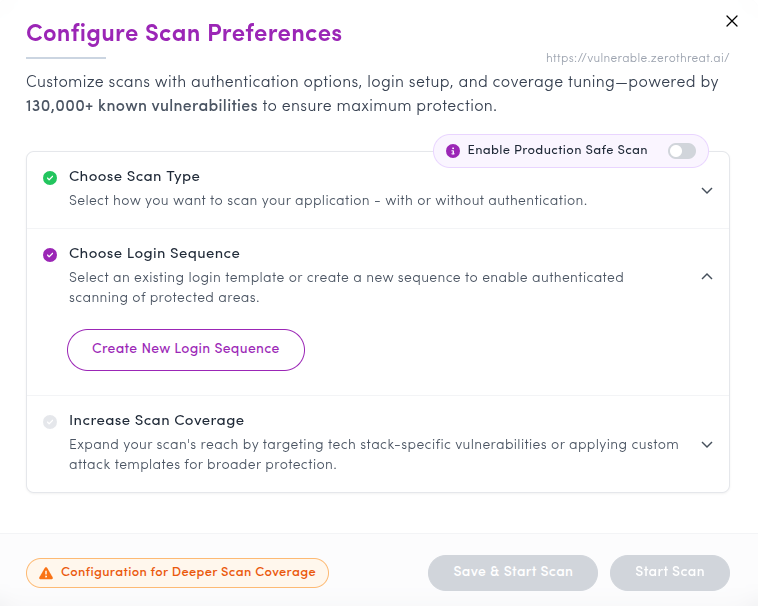
Tip: If you already have a previously recorded login sequence, you can select and reuse it directly without going through the recording steps. This is especially useful when running scans against the same target with the same authentication flow.
This will launch your target web application in a new tab, along with the ZeroThreat Recorder Chrome window.
Minimize the Recorder Window
You can minimize the Recorder window, but keep it open throughout the process.
Visit Troubleshooting: Extension Not Opening if the extension doesn't open automatically in new tab along with target.
For opening and using the chrome extension in ZeroThreat On-Prem version. Refer to ZeroThreat Extension.
3. Configure the Recorder
Once the extension is loaded, start by clicking on the Stored Sequence Authentication button. This feature allows ZeroThreat to store and replay your authentication details, making it ideal for scheduled scans and DevOps automation.

- Next you’ll have two options Full Scan or Scan Recorded Pages & Actions. A Full Scan covers the entire web application, while a Scan Recorded Pages & Actions scan only the pages you visit during recording.
Choose Scan Recorded Pages & Actions if you only want to test the specific pages and interactions captured during your recording session. This is particularly useful when you want to quickly test a particular feature or flow without scanning the entire application. Check Scan Recorded Pages & Actions for more details.

- Click the Start Recording (
 ) button to begin recording. The ZeroThreat Recorder will capture all your actions as you interact with the application.

4. Log In and Navigate the Target Application
As the recording begins log in to the target application using your credentials.
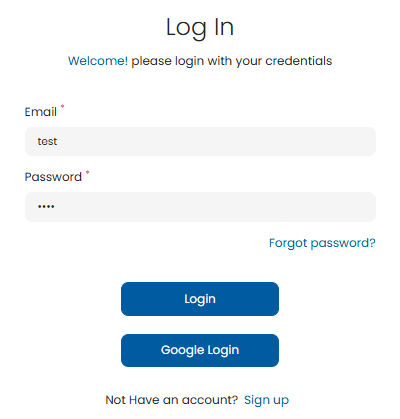
After logging in, navigate through the specific sections or functionalities you want to scan. The Recorder will track these interactions, ensuring the scan is limited to only the visited pages—it won’t crawl or test beyond what you navigate. For our example we will scan the Course List section and visit all the pages and functionalities related to it.
Avoid unnecessary actions to keep the recording focused on the intended areas.
When you’ve finished navigating the desired sections in our example the Course List functionality, click Stop Recording( ) to stop the recording. You’ll see an overview of your recorded sequence.
5. Configure the Template Information
After stopping, an overview and configuration for the template will open.
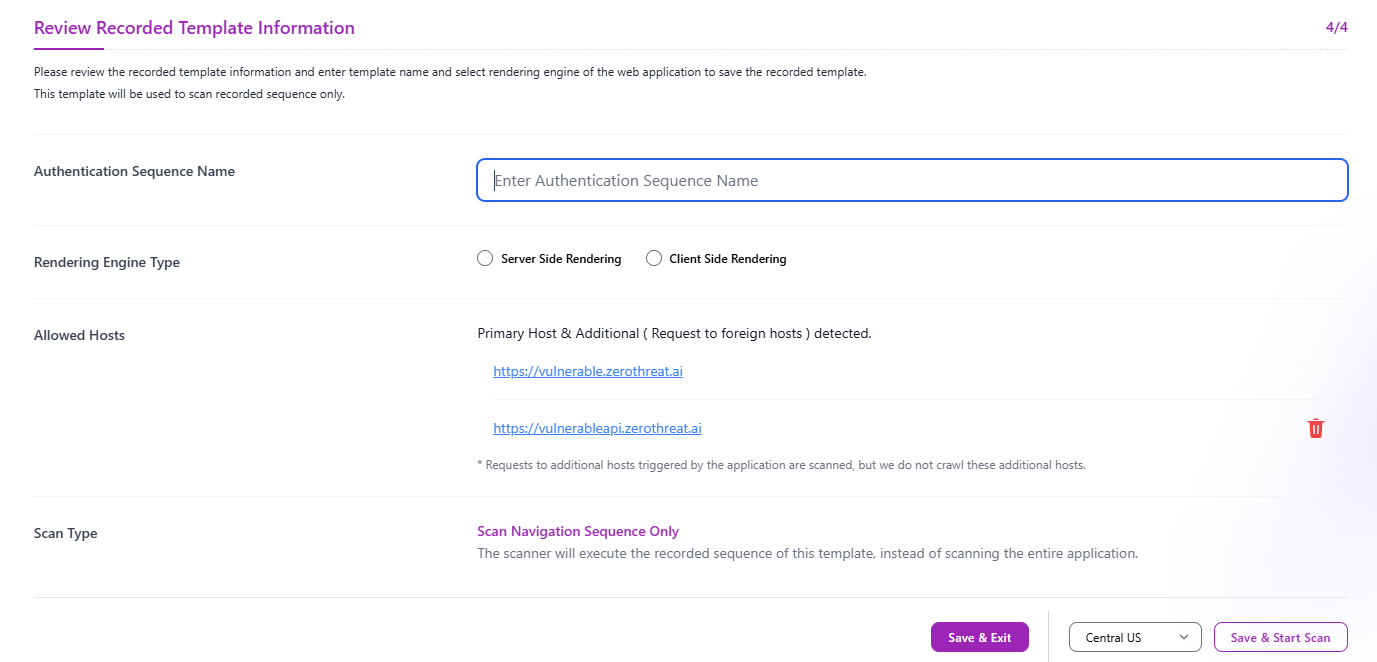
Here configure the following:
- Name the Template: Assign a meaningful name to your recording for easy reference later.

- Choose the Content Rendering Type: Select whether the application uses server-side rendering (e.g., WordPress, PHP, ASP.NET) or client-side rendering (e.g., Angular, React, Vue).

- Optionally, exclude certain hosts from being scanned. This is useful for skipping hosts with sensitive data or third-party integrations.

6. Review and Start the Scan
After reviewing the recording information you will have two options.

- Click Save and Exit(
 ) to store the recording sequence for later use.
 - Click Save and Start Scan(
 ) to launch the scan immediately using your selected scan server.
7. Continue Configuring Scan Preferences
Back in Configure Scan Preferences, you will also see the Increase Scan Coverage option.
This lets you include additional coverage as part of the scan. For more details, refer to the Scan Profile documentation. For now, we will leave it as it is.
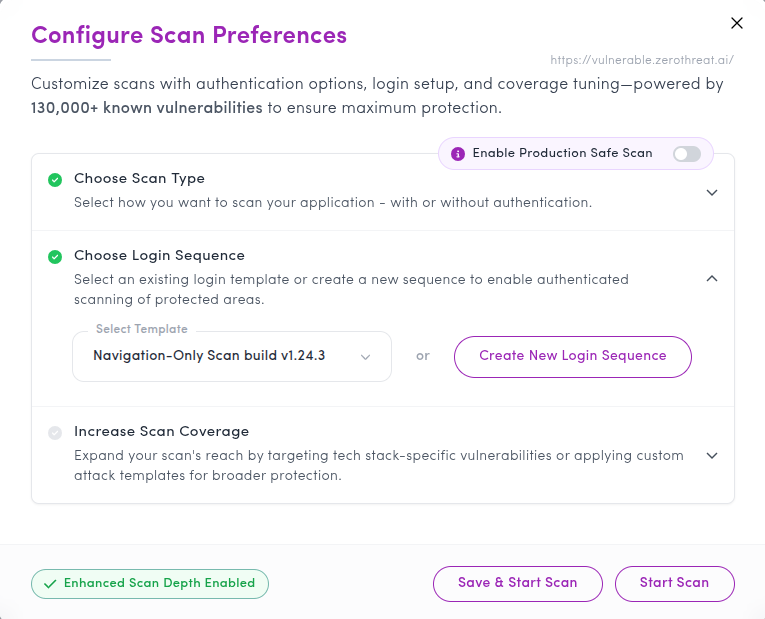
At the bottom, you will find two options: Save & Start Scan and Start Scan.
Save & Start Scan creates a reusable Scan Profile that you can select again for future scans, while Start Scan runs the scan as a one-off without saving the profile.
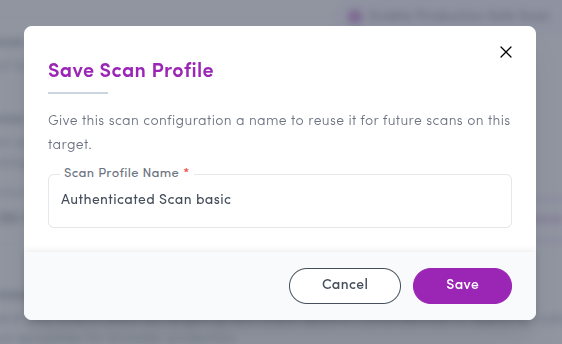
For this example, choose Save & Start Scan. This opens a popup where you can provide a name for the Scan Profile. Enter a meaningful name, click Save, and ZeroThreat will save the profile and start the scan immediately.
8. Monitor the Scan
The scan will start immediately and you can track its progress and view results in the Scans section or Recent Scans section in the ZeroThreat portal.

Tips & Cautions
- Focused Navigation: Only navigate the sections you want scanned. Unnecessary actions may include unintended pages in the recording.
- Host Exclusion: Use the exclude hosts feature to avoid scanning sensitive or third-party resources unintentionally.
Need help understanding your scan results? Visit the Scan Results section for detailed guidance.