Getting Started
Manage Targets
Manage Scans
Manage Organizations
Organization Settings
Plans
On Prem
Scan with Login Sequence
Authenticated Scan
When scanning web applications for vulnerabilities, authenticated sections often hold critical functionality and sensitive data. These areas are typically protected by login mechanisms, making them essential to include in your scans. The ZeroThreat Chrome Extension bridges this gap by enabling you to record login sequences and effectively scan these protected sections.
This extension simplifies the process of capturing login sequence. By recording your interactions during login, ZeroThreat ensures these workflows are replicated during scanning, allowing the scanner to access and test all areas of your application.
Using the Chrome Extension to record a login sequence is a straightforward process. It involves selecting your target application, navigating through the login process, and tagging the necessary actions (like login, logout, and authenticated requests). Once recorded, this sequence can be used to perform an authenticated scan, ensuring a comprehensive assessment of your application’s security.
How to perform an Authenticated Scan with Login Sequence?
Before you start
Ensure that the latest version of ZeroThreat Chrome Recorder extension is installed on your browser.
1. Select Your Target
- From the ZeroThreat dashboard, click Scan the Target and choose the web application you wish to scan. Next change the scanning server if required.

The scanning server determines from where the scan traffic originates. If your application is only accessible from a specific region or responds better to nearby traffic, select a scan location closest to your application. Refer to Target Configuration documentation for more details.
2. Set Up Your Scan Profile
- Under Scan Method, you will now find the option to Set Up Your Scan Profile. Click on Create a Scan Profile.
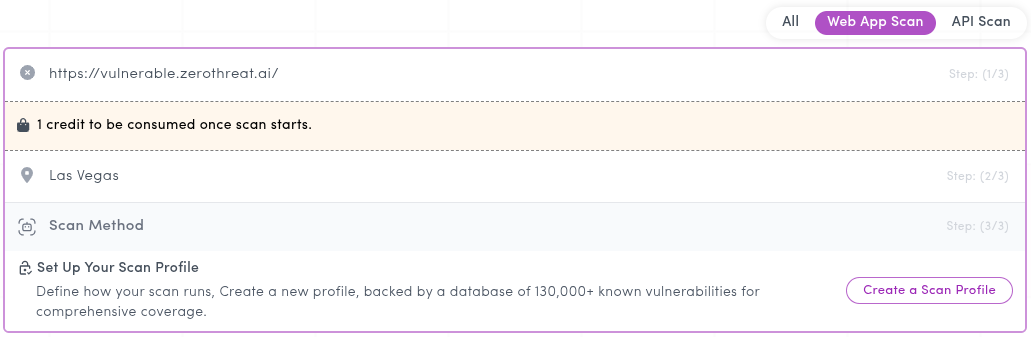
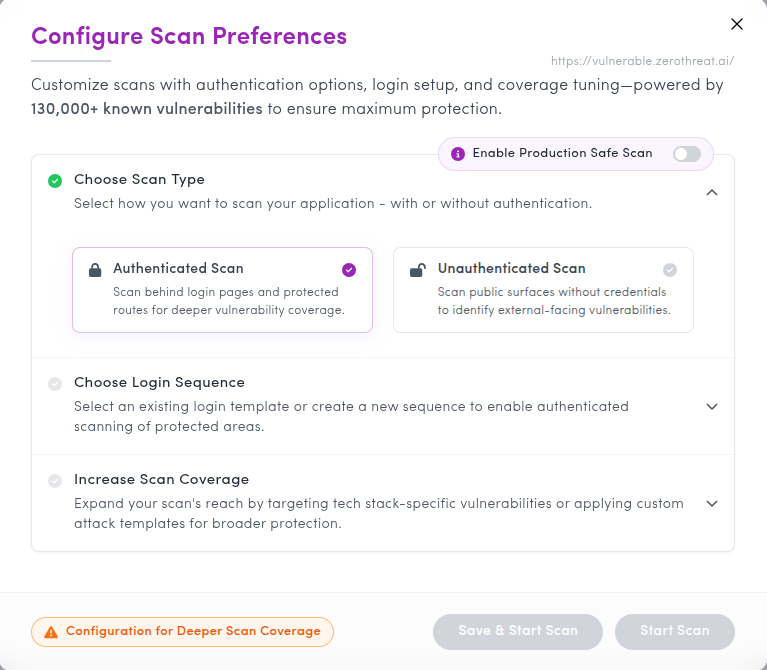
- This opens a new popup called Configure Scan Preferences. Under Choose Scan Type, select Authenticated Scan.
- Next, under Choose Login Sequence, click Create New Login Sequence to create a new one. If you already have a previously created login sequence, you can select and reuse it for future scans.
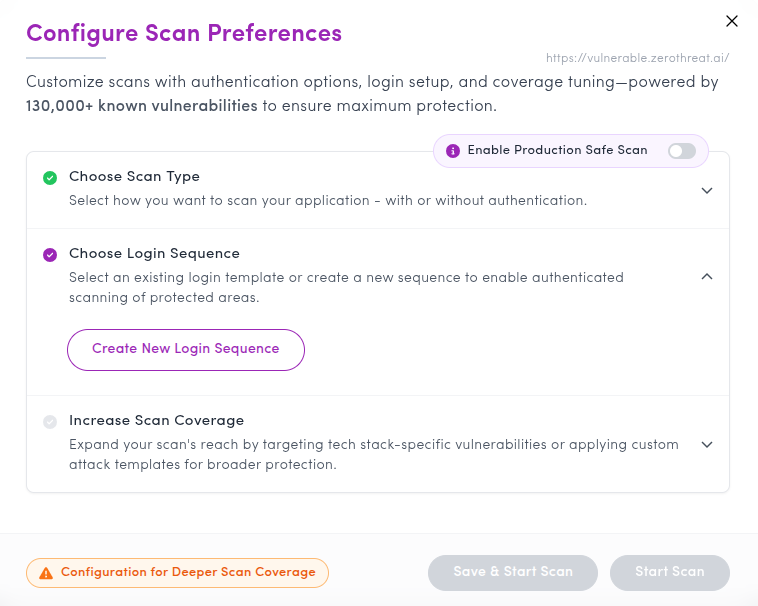
Tip: If you already have a previously recorded login sequence, you can select and reuse it directly without going through the recording steps. This is especially useful when running scans against the same target with the same authentication flow.
- This will launch your target web application in a new tab, along with the ZeroThreat Recorder Chrome window.
Minimize the Recorder Window
You can minimize the Recorder window, but keep it open throughout the process.
Visit Troubleshooting: Extension Not Opening if the extension doesn't open automatically in new tab along with target.
For opening and using the chrome extension in ZeroThreat On-Prem version. Refer to ZeroThreat Extension.
3. Configure the Recorder
- Once the extension is loaded, start by clicking on the Stored Sequence Authentication button. This feature allows ZeroThreat to store and replay your authentication details, making it ideal for scheduled scans and DevOps automation.

- Next you’ll have two options Full Scan or Scan Recorded Pages & Actions. A Full Scan covers the entire web application, while a Scan Recorded Pages & Actions scan only the pages you visit during recording.
Choose Scan Recorded Pages & Actions if you only want to test the specific pages and interactions captured during your recording session. This is particularly useful when you want to quickly test a particular feature or flow without scanning the entire application. Check Scan Recorded Actions & Pages for more details.
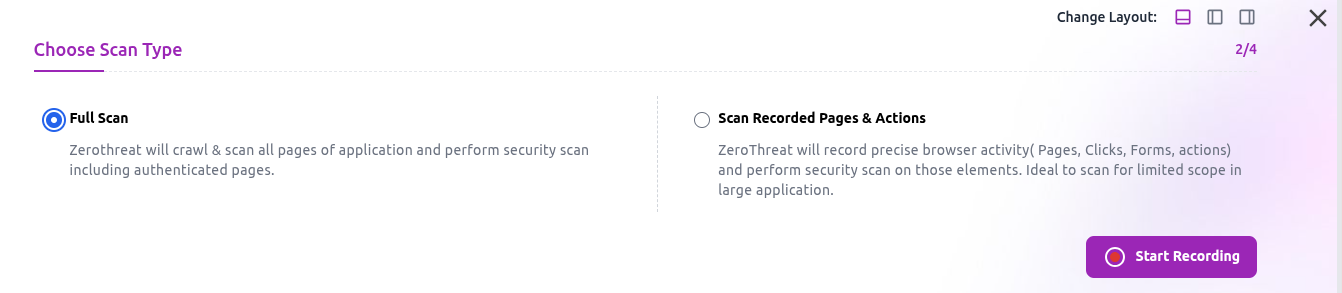
- Click the Start Recording (
 ) button to begin recording. The ZeroThreat Recorder will capture all your actions as you interact with the application.

4. Login and Navigate the target application
- Now Log in to the target application using your credentials.
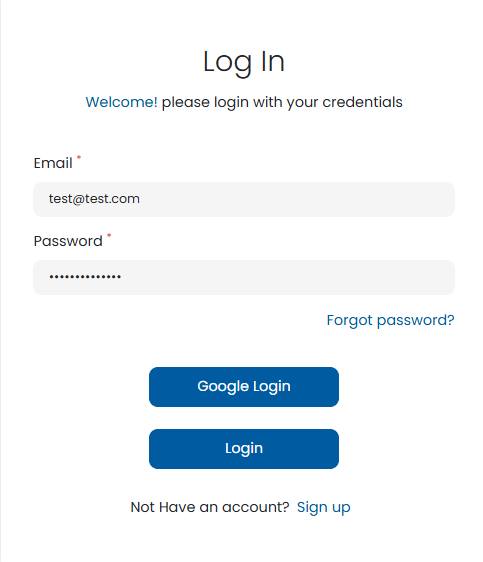
- After logging in, navigate few authenticated areas of the target application. The Recorder will capture all these actions, which are crucial for scanning protected sections of the app.
Avoid performing any non-essential actions during this session to ensure only relevant interactions are recorded.
- Once done navigating, log out of the target application.

- Click on Stop Recording (
 ) to stop the recording.
5. Configure the Template Information
After stopping, an overview and configuration for the template will open.
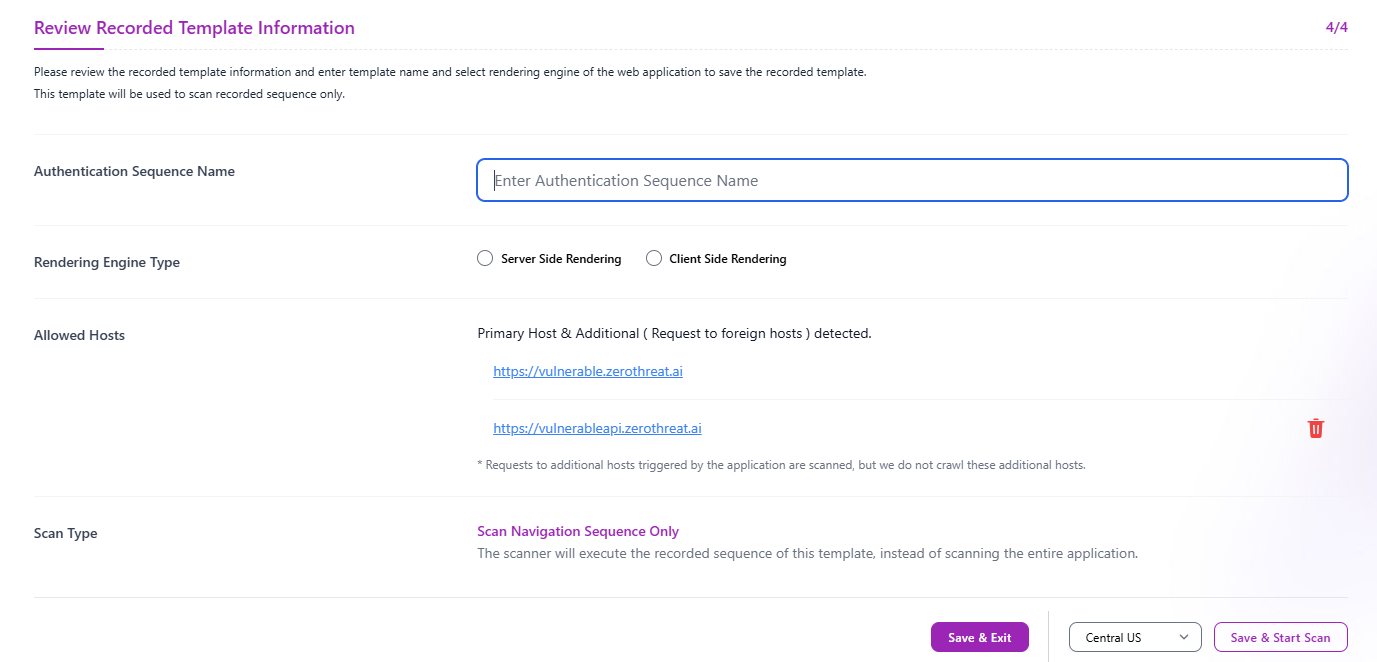
Here configure the following:
- Name the Template: Assign a meaningful name to your recording for easy reference later.

- Choose the Content Rendering Type: Select whether the application uses server-side rendering (e.g., WordPress, PHP, ASP.NET) or client-side rendering (e.g., Angular, React, Vue).

- Optionally, exclude certain hosts from being scanned. This is useful for skipping hosts with sensitive data or third-party integrations.

- The next step is Authentication Page Marking. By default, ZeroThreat automatically marks: one request for login, one for an authenticated page, and one for logout. This helps the scanner perform more thorough scanning.

- If needed, switch to the Custom option to manually tag these requests yourself:
- First, select the login request as "Login".
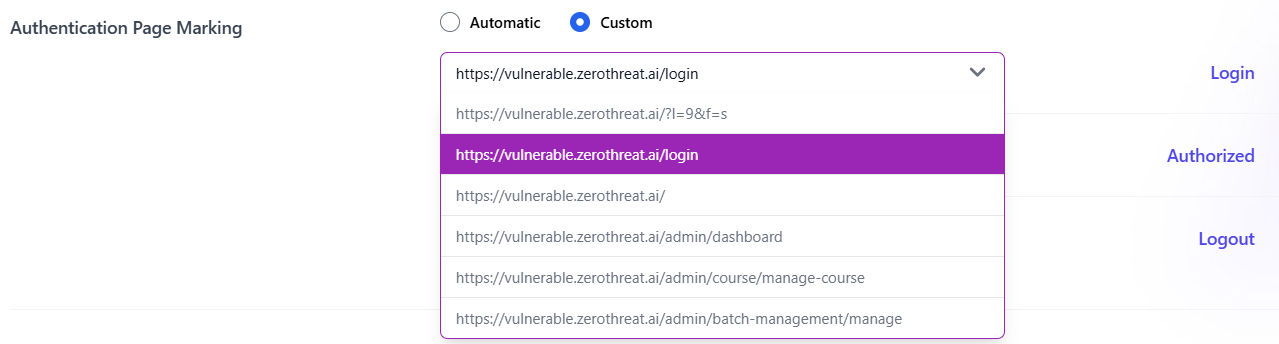
- Then, select any request accessible only after login as "Authorized"

- Lastly, select the logout request as "Logout." If you don’t see the logout request, you can also mark the page from where the logout action was performed. In our case we logged out from the batch-management page so we mark that as logout.

If your logout endpoint doesn’t show up in the recorded requests, don’t worry. Simply mark the last request from where you logged out of your application. This ensures proper tracking of the session flow.
6. Review and Finalize the Recorded Data
After reviewing the recording information you will have two options.

- Click Save and Exit (
 ) to store the recording sequence for later use.
 - Click Save and Start Scan (
 ) to launch the scan immediately using your selected scan server.
In our case, we click Save & Exit. Once you return to the ZeroThreat portal, your login sequence will be saved and you can continue with the scan setup.
7. Continue Configuring Scan Preferences
Back in Configure Scan Preferences, you will also see the Increase Scan Coverage option.
This lets you include additional coverage as part of the scan. For more details, refer to the Scan Profile documentation. For now, we will leave it as it is.
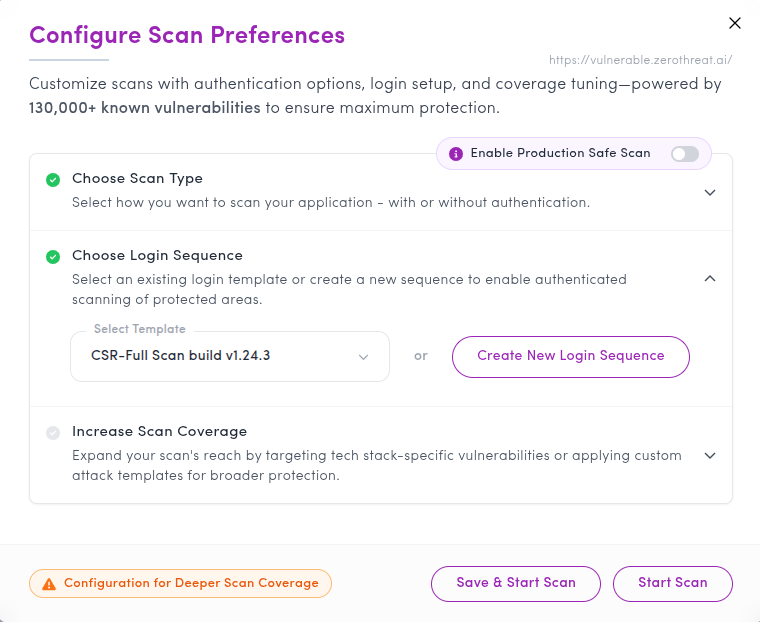
At the bottom, you will find two options: Save & Start Scan and Start Scan.
Save & Start Scan creates a reusable Scan Profile that you can select again for future scans, while Start Scan runs the scan as a one-off without saving the profile.
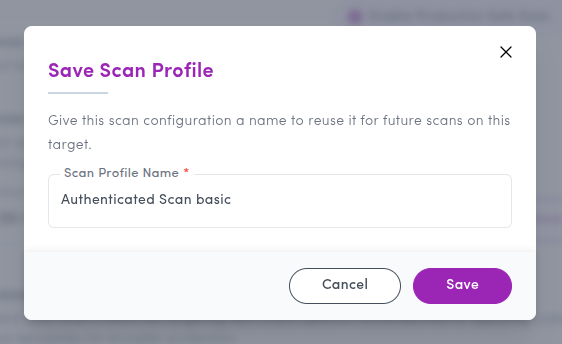
For this example, choose Save & Start Scan. This opens a popup where you can provide a name for the Scan Profile. Enter a meaningful name, click Save, and ZeroThreat will save the profile and start the scan immediately.
8. Monitor the Scan
The scan will start immediately and you can track its progress and view results in the Scans section or Recent Scans section in the ZeroThreat portal.

Tips & Cautions
- Accurate Tagging: Be sure to correctly tag the login, authenticated, and log-out HTTP requests. This ensures that the scanner performs a complete and accurate scan of all protected areas.
- Avoid Non-Essential Actions: During the recording session, refrain from interacting with any part of the application that isn’t relevant to the authentication flow. This keeps your recorded data focused and clean.
- Sensitive Data Handling: If your application interacts with third-party services or contains sensitive data, review and adjust the recorded HTTP requests carefully to avoid scanning external or protected resources unintentionally.
If your application uses complex authentication mechanisms such as SSOs, CAPTCHAs, or OTPs, the standard login sequence recording may not be sufficient.
Check out our guide on Scan MFA App for more advanced security testing.