
Getting Started
Manage Targets
Manage Scans
Manage Organizations
Organization Settings
Plans
On Prem

ZeroThreat Extension
Once configured, the extension will work normally with your On-Prem instance and can be used for authenticated scans, MFA scans, and others.
When is this required?
This setup is required only when you want to use the ZeroThreat Chrome Extension with a ZeroThreat On-Prem instance.
If you are using ZeroThreat Cloud, no additional extension configuration is required.
Configure the Extension for On-Prem
Step 1: Open the ZeroThreat Extension
Click the ZeroThreat Extension icon from your Chrome toolbar.

This opens the extension popup.
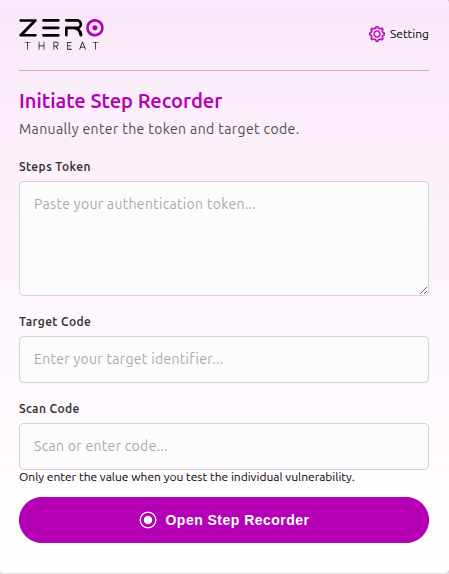
Step 2: Open Extension Settings
Inside the extension popup, click the Setting ( ) icon.
This opens the On-Premise Application URL setting.
Step 3: Enter Your On-Prem Application URL
In the On-Premise Application URL field, enter your ZeroThreat On-Prem application URL.
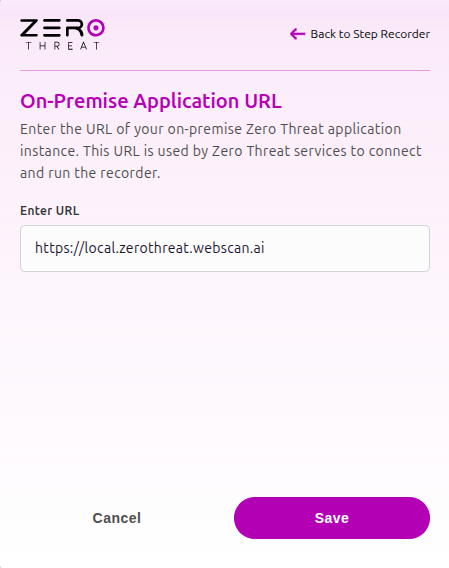
Example:
https://local.zerothreat.webscan.ai
Click Save.
Once saved, the extension will connect to your On-Prem instance and work normally for supported extension-based workflows.
Switching Back to ZeroThreat Cloud
You can keep the On-Prem application URL configured for as long as you are using the extension with ZeroThreat On-Prem.
If you later want to use the extension with ZeroThreat Cloud, remove the On-Prem URL from the extension settings and click Save again.
After saving the empty value, the extension will return to its default Cloud behavior.
Using the Extension After Configuration
After the On-Prem application URL is saved, you can use the ZeroThreat Extension normally with your On-Prem instance. The extension will connect to your configured On-Prem URL and can be used for scanning workflows such as authenticated scans, MFA-protected application scans, and others.
For detailed steps on using the extension during scans, refer to the Authenticated Scan, Scan MFA App, and Scan Recorded Pages & Actions guides.